Usage
If you’ve just finished generating your experiments container (whether a custom build or pull of an already existing container) then you are ready to use it! These sections will discuss runtime variables, along with settings like experiment order and database type.
Summary of Variables
Below, we will summarize the variables that can be set at runtime:
| Variable | Description | Default |
|---|---|---|
| database | the database to store response data | filesystem |
| headless | require pre-generated tokens for headless use | flag |
| randomize | present the experiments in random order | flag |
| no-randomize | present the experiments in random order | flag |
| experiments | comma separated list of experiments to expose | [] |
| studyid | set the studyid at runtime | expfactory |
If you have variables to set on a per-subject basis, then you can also define these with a custom variables file. See participant variables below to undestand this.
Start the Container
The first thing you should do is start the container. The variables listed above can be set when you do this.
Save Data to the Host
It’s most likely the case that your container’s default is to save data to the file system, and use a study id of expfactory. This coincides to running with no extra arguments, but perhaps mapping the data folder:
docker run -v /tmp/my-experiment/data/:/scif/data \
           -d -p 80:80 \
           expfactory/experiments start
Custom Databases
Here is how you would specify a different studyid. The study id is only used for a folder name (in the case of a fileystem save) or an sqlite database name (for sqlite3 database):
docker run -v /tmp/my-experiment/data/:/scif/data \
           -d -p 80:80 \
           expfactory/experiments  --studyid dns start
Here is how to specify a different database, like sqlite
docker run -v /tmp/my-experiment/data/:/scif/data \
           -d -p 80:80 \
           expfactory/experiments  --database sqlite start
Custom Experiment Set
Here is how to limit the experiments exposed in the portal. For example, you may have 30 installed in the container, but only want to reveal 3 for a session:
docker run -v /tmp/my-experiment/data/:/scif/data \
           -d -p 80:80 \
           expfactory/experiments  --experiments test-test,tower-of-london start
Participant Variables
When you start your container, you will have the option to provide a comma separated file (csv) of subject identifiers and experiment variables. These variables will simply be passed to the relevant experiments that are specified in the file given that a particular participant token is running. The variables are not rendered or otherwise checked in any way before being passed to the experiment (spaces and capitalization matters, and the experiment is required to do any extra parsing needed in the Javascript). The server does not do any kind of custom parsing or checks for them. Let’s look at an example file to better understand this. The format of the file should be flat and tab delimited (default) with fields for an experiment id (exp_id), variable name and values (var_name, var_values) and then a token assigned to each:
exp_id,var_name,var_value,token
test-parse-url,globalname,globalvalue,*
test-parse-url,color,red,123
test-parse-url,color,blue,456
test-parse-url,color,pink,789
test-parse-url,words,at the thing,123
test-parse-url,words,omg tacos,456
test-parse-url,words,pancakes,789
In the example above, the participants defined have tokens 123 and 456. For any other participants, we have defined a global variable globalname to be globalvalue. The first row in the file is non negoatiable - it must have four fields, in that order,
and name. The fields are the following:
- exp_id The Experiment Factory identifier that identifies the experiment
- var_name The variable name to pass into the url
- var_value the variable_value to pass
- token the subject token to pass for. If a particular combination of exp_id and token is seen twice, a warning will be issued and the later defined taken preference. If you set token to “*” it will be treated as a global variable, and set for all subject ids (also defined in the file) that do not have a previously defined value for the variable in question.
The variables will be passed to the experiment test-parse-url via the URL, and it’s up to the experiment to parse them with JavaScript. For example, if I am participant 789 and I start the test-parse-url task, my variables will be passed in the format (shown for one and more than one variable):
<base-url>/experiments/<exp_id>?<var_name>=<var_value>
<base-url>/experiments/<exp_id>?<var_name1>=<var_value1>&<var_name2>=<var_value2>
which corresponds to this for the file above:
http://127.0.0.1/experiments/test-parse-url?globalname=globalvalue&color=pink&words=pancakes
The parameters are simply passed to the experiment, and the experiment is expected to parse them appropriately. Since the data file is loaded at start of the container and you would need to generate users before using them, you will want to:
- start the container in detached mode
-dand then generate users - list the users or otherwise get the identifiers that you’ve created
- create the variables file with the user ids specified
- stop the container, making sure to restart with the same database mapped.
A complete example of this is provided in the test-parse-url repository and the commands are briefly summarized below.
# Pull the example container with the url experiment (or create your own!)
docker pull vanessa/test-parse-url:v3.1 .

# Start it in detached mode, named test-parse-url, filesystem database is mapped to the host
docker run --name test-parse-url -d -v $PWD:/scif/data -p 80:80 vanessa/test-parse-url start

# Verify no participants
docker exec test-parse-url expfactory users --list

# Create three users, and list identifiers to write into file
docker exec test-parse-url expfactory users --new 3
exec d8c612e0dfa2 expfactory users --list
/scif/data/expfactory/017305e8-7eba-4d43-bc81-e95f5ceab0a8	017305e8-7eba-4d43-bc81-e95f5ceab0a8[active]
/scif/data/expfactory/275ae6ea-5d33-499e-a3db-2bbcc4881ff4	275ae6ea-5d33-499e-a3db-2bbcc4881ff4[active]
/scif/data/expfactory/a737a811-1bcc-449c-b0b0-9acded60bbd9	a737a811-1bcc-449c-b0b0-9acded60bbd9[active]
Here is the new data variables file:
exp_id,var_name,var_value,token
test-parse-url,globalname,globalvalue,*
test-parse-url,color,red,017305e8-7eba-4d43-bc81-e95f5ceab0a8
test-parse-url,color,blue,275ae6ea-5d33-499e-a3db-2bbcc4881ff4
test-parse-url,words,at the thing,017305e8-7eba-4d43-bc81-e95f5ceab0a8
test-parse-url,words,omg tacos,275ae6ea-5d33-499e-a3db-2bbcc4881ff4
Stop the container and verify the filesystem database persists on the host.
$  ls expfactory/
017305e8-7eba-4d43-bc81-e95f5ceab0a8  275ae6ea-5d33-499e-a3db-2bbcc4881ff4  a737a811-1bcc-449c-b0b0-9acded60bbd9
Run the container again, this time specifying the variables file with --vars. Since we are using a filesystem database we don’t need to start
the exact same container, but you could if you wanted to. You can also change the delimiter with --delim.
docker run -d -v $PWD:/scif/data -p 80:80 vanessa/test-parse-url --vars /scif/data/variables.csv --headless start
Note that you can also export these settings in the environment of your container as EXPFACTORY_RUNTIME_VARS and EXPFACTORY_RUNTIME_DELIM. If you have experiment variables that are required or defaults, you could thus build the container and include the file inside,
and export the environment variable in the container to the file. Make sure to open the experiment in a new browser tab, in case you have any previous sessions (data in the browser cache). When we enter one of our participant identifiers, we see the variables passed on!

For a complete tutorial of the above, see the test-parse-url repository.
Start a Headless Experiment Container
“Headless” refers to the idea that you going to be running your experiment with remote participants, and you will need to send them to a different portal that has them login first. In order to do this, you need to start the container with the --headless flag, and then issue a command to pre-generate these users.
First we can start the container (notice that we are giving it a name to easily reference it by) with --headless mode.
docker run -p 80:80 -d --name experiments -v /tmp/data:/scif/data <container> --headless start
4f6826329e9e366c4d2fb56d64956f599861d1f0439d39d7bcacece3e88c7473
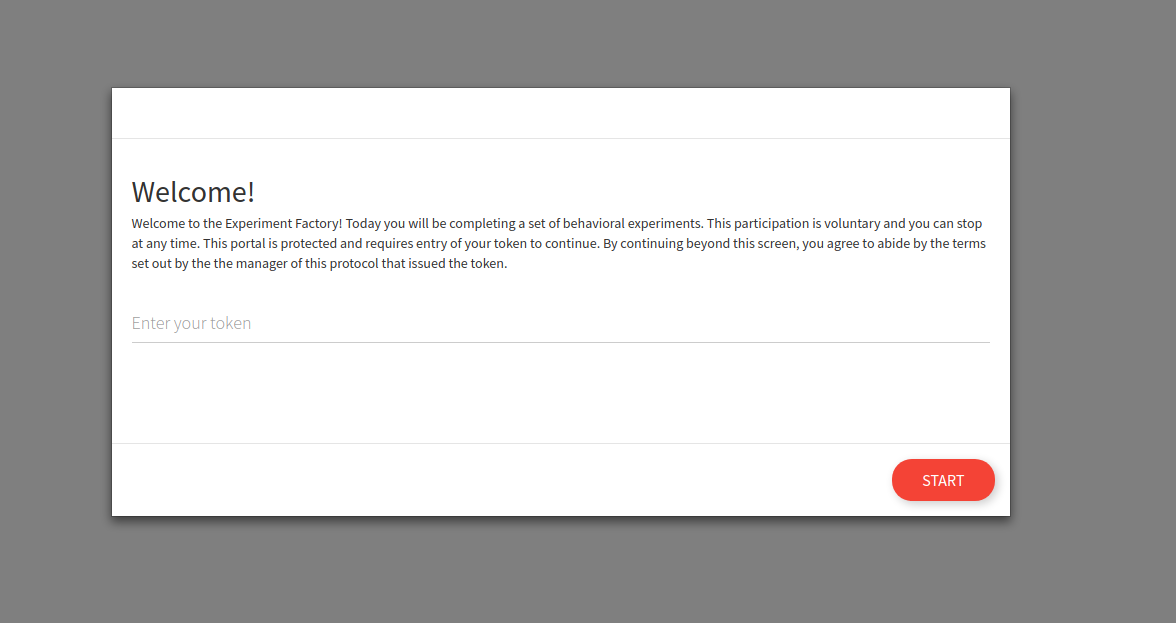
If we go to the portal at 127.0.0.1 we will see a different entrypoint, one that requires a token.
You can also start and specify to not randomize, and present experiments in a particular order:
docker run -p 80:80 -d --name experiments -v /tmp/data:/scif/data <container> \
                    --headless --no-randomize \
                    --experiments test-task,tower-of-london start
If you ask for non random order without giving a list, you will present the experiments in the order listed on the filesystem. See pre-set-experiments for more information.
Generate tokens
A “token” is basically a subject id that is intended to be used once, and can be sent securely to your participants to access the experiments. The token can be refreshed, revoked, or active. You will need to generate them, and briefly it looks like this:
docker exec experiments expfactory users --help
docker exec experiments expfactory users --new 3
See managing users for complete details about generating, refreshing, and using tokens.
Use tokens
Once you generate tokens for your users (and remember that it’s up to you to maintain the linking of anonymous tokens to actual participants) the tokens can be entered into the web interface:

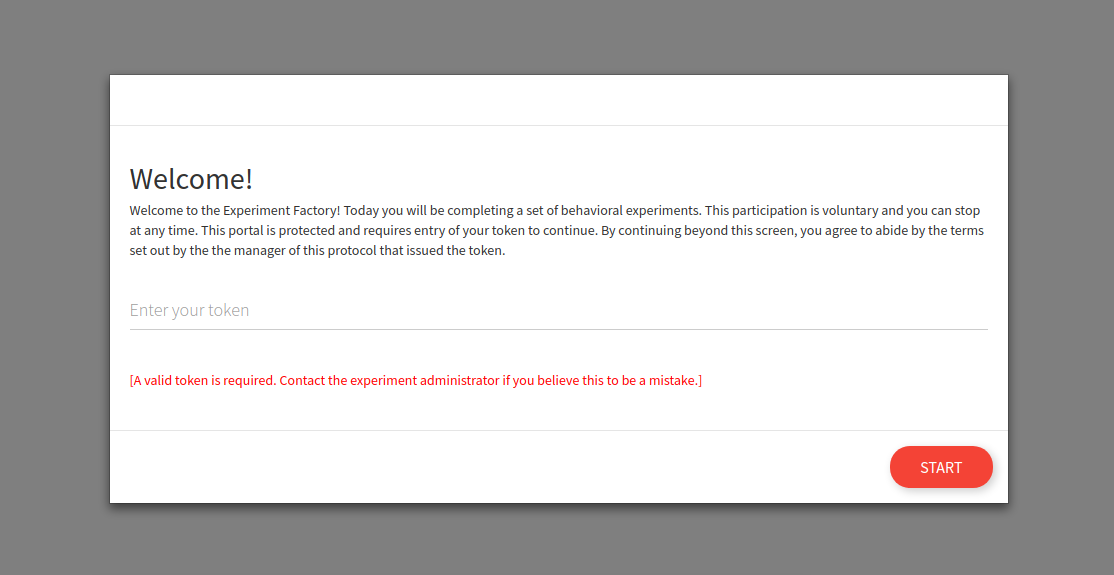
And of course it follows that if you enter a bad token, you cannot enter.
Once entry is given, the user can continue normally to complete the experiments in the protocol. If you want to provide the pre-generated URL to your participants to skip the login, you can have them navigate to this url
https://<your-server>/login?token=<token>
https://<your-server>/login?token=a34d4512-1841-4219-873d-2b9d1727a37a
Important since this is sending data with a GET request, this is not recommended to do without https.
Headless Finish
When the user finishes the protocol, the user will have the token revoked so an additional attempt to do the experiments will not work. You would need to generate a new session with token (the --new command above) or restart the participant to rewrite the previously generated data.
Pre-set Experiments
For a headless experiment, you don’t have the web interface to filter experiments in advance, or as for random (or not random) ordering. By default, not giving the --experiments argument will serve all experiments found installed in the container. If you want to limit to a smaller subset, do that with the experiments argument:
docker run -p 80:80 -d \
           --name experiments \
           -v /tmp/data:/scif/data <container> --experiments tower-of-london,test-task --headless start
and if you want the order typed to be maintained (and not random) add the --no-randomize flag.
docker run -p 80:80 -d \
           --name experiments \
           -v /tmp/data:/scif/data <container> --experiments tower-of-london,test-task --headless --no-randomize start
Container Logs
The expfactory tool in the container will let you view (or keep open) the experiment logs. You can do this by issuing a command to a running container:
$ docker exec angry_blackwell expfactory logs
New session [subid] expfactory/f57bd534-fa50-4af5-9114-d0fb769c5de4
[router] None --> bis11-survey for [subid] expfactory/f57bd534-fa50-4af5-9114-d0fb769c5de4 [username] You
Next experiment is bis11-survey
[router] bis11-survey --> bis11-survey for [subid] expfactory/f57bd534-fa50-4af5-9114-d0fb769c5de4 [username] You
Redirecting to /experiments/bis11-survey
Rendering experiments/experiment.html
Saving data for bis11-survey
Finishing bis11-survey
Finished bis11-survey, 0 remaining.
Expfactory Version: 3.0
if you want the window to remain open to watch, just add --tail
$ docker exec angry_blackwell expfactory logs --tail
You can equally shell into the contaniner and run expfactory logs directly.
User Management
This section will go into detail about generation, restart, revoke, and refresh of tokens.
- generation means creating a completely new entry in the database. Previous entries for a participant are irrelevant, you need to keep track of both.
- restart means that you are removing any
finishedstatus from a known participant token identifier. This means that the participant can navigate to the portal and retake the experiments, having the data saved under the previous identifier. Previous data is over-written. - revoke means that the participant is no longer allowed to participate. The token essentially becomes inactive.
- refresh means that a new token is issued. Be careful with refreshing a token, because you will need to keep track of the change in the subject token (the main identifier to the data).
Application Flow
The flow for a user session is the following:
Headless
- You generate an id and token for the user in advance
- The user starts and completes the experiments with the token associated with the id
- The token is revoked upon finish, meaning that the user cannot go back without you refreshing it.
Interactive
- The user is automatically issued an id upon starting the experiment, nothing is pre-generated
- When the user finishes,
_finishedis appended to the session folder, and so restarting the session will create a new folder. - If the user is revoked, the folder is appended with
_revoked - If the user finishes and returns to the portal, a new session (different data folder) is created.
If you are running an experiment in a lab and can expect the user to not return to the portal, the interactive option above is ok. However if you are serving the battery remotely, or if you want to better secure your databases, it’s recommend to run the experiment container headless. In this section, we will talk about user management that is relevant to a headless (without an interactive portal) start.
User Management Help
The main entrypoint for managing users is with expfactory users:
expfactory users --help
usage: expfactory users [-h] [--new NEW] [--list] [--revoke REVOKE]
                        [--refresh REFRESH] [--restart RESTART]
                        [--finish FINISH]
optional arguments:
  -h, --help         show this help message and exit
  --new NEW          generate new user tokens, recommended for headless
                     runtime.
  --list             list current tokens, for a headless install
  --revoke REVOKE    revoke token for a user id, ending the experiments
  --refresh REFRESH  refresh a token for a user
  --restart RESTART  restart a user, revoking and then refresing the token
  --finish FINISH    finish a user session by removing the token
Important For filesystem databases, the token coincides with the data folder, and is the user id. When you reference an id for a filesystem save, you reference the token (e.g., 41a451cc-7416-4fab-9247-59b1d65e33a2) however when you reference a relational database id, you reference the index. You should keep track of these corresponding values to keep track of your participants, and be careful when you refresh tokens as the filesystem folder (and thus participant id) will be renamed.
New Users
As shown previously, we can use exec to execute a command to the container to create new users:
docker exec experiments expfactory users --new 3
DATABASE	TOKEN
/scif/data/expfactory/41a451cc-7416-4fab-9247-59b1d65e33a2	41a451cc-7416-4fab-9247-59b1d65e33a2[active]
/scif/data/expfactory/6afabdd5-7d5e-48dc-a3b2-ade235d2e0a6	6afabdd5-7d5e-48dc-a3b2-ade235d2e0a6[active]
/scif/data/expfactory/3251fd0e-ba3e-4089-b01a-28dfa03f1fbd	3251fd0e-ba3e-4089-b01a-28dfa03f1fbd[active]
The result here will depend on the database type.
DATABASE: The above shows a filesystem save, so aDATABASErefers to the folder, and remember this is internal to the container, so you might have/scif/datamapped to a different folder on your host. A relational database would have theDATABASEcolumn correspond with the index.TOKEN: The token corresponds with the folder (for filesystem) or relational databasetokenvariable, and shown also is the participant status (e.g.,active).
You can copy paste this output from the terminal, or pipe into a file instead:
docker exec experiments expfactory users --new 3 >> participants.tsv
You can also issue these commands by shelling inside the container, which we will do for the remainder of the examples:
docker exec -it experiments bash
List Users
If you ever need to list the tokens you’ve generated, you can use the users --list command. Be careful that the environment variable EXPFACTORY_DATABASE is set to be the one that you intend. For example, a filesystem database setting will print all folders found in the mapped folder given this variable is set to filesystem. In the example below, we list users saved as folders on the filesystem:
 expfactory users --list
DATABASE	TOKEN
/scif/data/expfactory/41a451cc-7416-4fab-9247-59b1d65e33a2	41a451cc-7416-4fab-9247-59b1d65e33a2[active]
/scif/data/expfactory/6afabdd5-7d5e-48dc-a3b2-ade235d2e0a6	6afabdd5-7d5e-48dc-a3b2-ade235d2e0a6[active]
/scif/data/expfactory/3251fd0e-ba3e-4089-b01a-28dfa03f1fbd	3251fd0e-ba3e-4089-b01a-28dfa03f1fbd[active]
This would be equivalent to the following below. This is the suggested usage because a single container can be flexible to have multiple different kinds of databases:
expfactory users --list --database filesystem
If we were to list a relational database, we would see the database index in the DATABASE column instead:
expfactory users --list --database sqlite
DATABASE	TOKEN
6	a2d266f7-52a5-497b-9b85-1e98febef6dc[active]
7	a98e63c4-2ed1-4de4-a315-a9291502dd26[active]
8	f524e1cc-6841-4417-9529-80874cf30b74[active]
We generally recommend for you to specify the --database argument unless you are using the database defined to be the container default, determinde by EXPFACTORY_DATABASE in it’s build recipe (the Dockerfile). You can always check the default in a running image (foo) like this:
docker inspect foo | grep EXPFACTORY_DATABASE
                "EXPFACTORY_DATABASE=filesystem",
Important For relational databases, remember that the token is not the participant id, as it will be cleared when the participant finished the experiments. In the example above, we would care about matching the DATABASE id to the participant. For filesystem “databases” the token folder is considered the id. Thus, you should be careful with renaming or otherwise changing a partipant folder, because the token is the only association you have (and must keep a record of yourself) to a participant’s data.
Restart User
If a user finishes and you want to restart, you have two options. You can either issue a new identifier (this preserves previous data, and you will still need to keep track of both identifiers):
expfactory users --new 1
DATABASE	TOKEN
/scif/data/expfactory/1753bfb5-a230-472c-aa04-ecdc118c1922	1753bfb5-a230-472c-aa04-ecdc118c1922[active]
or you can restart the user, meaning that any status of finished or revoked is cleared, and the participant can again write (or over-write) data to his or her folder. You would need to restart a user if you intend to refresh a token. Here we show the folder with list before and after a restart:
$ expfactory users --list
/scif/data/expfactory/04a144da-97f5-4734-b5ea-1658aa2170ce_finished	04a144da-97f5-4734-b5ea-1658aa2170ce[finished]

$ expfactory users --restart 04a144da-97f5-4734-b5ea-1658aa2170ce
[restarting] 04a144da-97f5-4734-b5ea-1658aa2170ce --> /scif/data/expfactory/04a144da-97f5-4734-b5ea-1658aa2170ce

$ expfactory users --list
/scif/data/expfactory/04a144da-97f5-4734-b5ea-1658aa2170ce	04a144da-97f5-4734-b5ea-1658aa2170ce[active]
You can also change your mind and put the user back in finished status:
$ expfactory users --finish 04a144da-97f5-4734-b5ea-1658aa2170ce
[finishing] 04a144da-97f5-4734-b5ea-1658aa2170ce --> /scif/data/expfactory/04a144da-97f5-4734-b5ea-1658aa2170ce_finished
or revoke the token entirely, which is akin to a finish, but implies a different status.
$ expfactory users --revoke 04a144da-97f5-4734-b5ea-1658aa2170ce
[revoking] 04a144da-97f5-4734-b5ea-1658aa2170ce --> /scif/data/expfactory/04a144da-97f5-4734-b5ea-1658aa2170ce_revoked

$ expfactory users --list
/scif/data/expfactory/04a144da-97f5-4734-b5ea-1658aa2170ce_revoked	04a144da-97f5-4734-b5ea-1658aa2170ce[revoked]
Refresh User Token
A refresh means issuing a completely new token, and this is only possible for status [active]. You should be careful with this because the folder is renamed (for filesystem) commands. If you have a finished or revoked folder and want to refresh a user token, you need to restart first. Here is what it looks like to refresh an active user token:
expfactory users --refresh 1320a84f-2e70-456d-91dc-083d36c68e17
[refreshing] 1320a84f-2e70-456d-91dc-083d36c68e17 --> /scif/data/expfactory/fecad5cd-b044-4b1a-8fd1-37aafdbf8ed7
A completely new identifier is issued, and at this point you would need to update your participant logs with this change.
Important For the examples above, since we are using a filesystems database, the participant id is the token. For relational databases, the participant id is the database index.
Having these status and commands ensures that a participant, under headless mode, cannot go back and retake the experiments unless you explicitly allow them, either by way of a new token or an updated one. If a user tried to complete the experiment again after finish or revoke, a message is shown that a valid token is required. If the user reads these documents and adds a _finished extension, it’s still denied.
Saving Data
Whether you choose a headless or interactive start, in both cases you can choose how your data is saved. The subtle difference for each saving method that result when you choose headless or interactive will be discussed below.
filesystem
Saving to the filesytem is the default (what you get when you don’t specify a particular database) and means saving to a folder called /scif/data in the Docker image. If you are saving data to the filesystem (filesystem database), given that you’ve mounted the container data folder /scif/data to the host, this means that the data will be found on the host in that location. In the example below, we have mounted /tmp/data to /scif/data in the container, and we are running interactive experiments (meaning without pre-generated tokens for login):
$ tree /tmp/data/expfactory/xxxx-xxxx-xxxx/

    /tmp/data/expfactory/xxxx-xxxx-xxxx/
       └── tower-of-london-results.json

0 directories, 1 file
If we had changed our studyid to something else (e.g., dns), we might see:
$ tree /tmp/data/dns/xxxx-xxxx-xxxx/

    /tmp/data/dns/xxxx-xxxx-xxxx/
       └── tower-of-london-results.json

0 directories, 1 file
Participant folders are created under the studyid folder. If you stop the container and had mounted a volume to the host, the data will persist on the host. If you didn’t mount a volume, then you will not see the data on the host.
Now we will talk about interaction with the data.
How do I read it?
For detailed information about how to read json strings (whether from file or database) see working with JSON. For a filesystem save, the data is saved to a json object, regardless of the string output produced by the experiment. This means that you can load the data as json, and then look at the data key to find the result saved by the particular experiment. Typically you will find another string saved as json, but it could be the case that some experiments do this differently.
sqlite
An sqlite database can be used instead of a flat filesytem. This will produce one file that you can move around and read with any standard scientific software (python, R) with functions to talk to sqlite databases. If you want to start your container and use sqlite3, then specify:
docker run -p 80:80 expfactory/experiments \
           --database sqlite \
           start
If you just specify sqlite the file will save to a default at /scif/data/<studyid>.db You can also specify a custom database uri that starts with sqlite, like sqlite:////tmp/database.db that will be generated in the container (and you can optionally map to the host). For example, here is my sqlite3 database under /scif/data, from within the container:
ls /scif/data
    expfactory.db
How do I read it?
You can generally use any scientific programming software that has libraries for interacting with sqlite3 databases. My preference is for the sqlite3 library, and we might read the file like this (in python):
import sqlite3
conn = sqlite3.connect('/scif/data/expfactory.db')

cur = conn.cursor()
cur.execute("SELECT * FROM result")
results = cur.fetchall()

for row in results:
    print(row)
Each result row includes the table row id, the date, result content, and participant id.
>>> row[0]  # table result row index
1

>>> row[1]  # date
'2017-11-18 17:26:30'

>>> row[2]  # data from experiment, json.loads needed
>>> json.loads(row[2])
[{
   'timing_post_trial': 100,
   'exp_id': 'test-task',
   'block_duration': 2000,
   'trial_index': 0,
    ...

   'key_press': 13,
   'trial_index': 5,
   'rt': 1083,
   'full_screen': True,
   'block_duration': 1083,
   'time_elapsed': 14579
}]

>>> res[3] # experiment id (exp_id)
'test-task'

>>> res[4] # participant id
7
Since the Participant table doesn’t hold anything beyond the participant id, you shouldn’t need to query it. More detail is added for loading json in (see loading results) below.
mysql
For labs that wish to deploy the container on a server, you are encouraged to use a more substantial database, such as a traditional relational database like MySQL or Postgres. In all of these cases, you need to specify the full database url. For mysql, we also specify using a particular driver called pymysql. For example:
# mysql
docker run -p 80:80 expfactory/experiments \
           --database  mysql+pymysql://username:password@host/dbname", \
           start

docker run -p 80:80 vanessa/experiment \
           --database "mysql+pymysql://root:expfactory@172.17.0.3/db" \
           start
As an example, let’s use a throw away Docker mysql container. We will start it first. You should either use an external database, or a more substantial deployment like Docker=compose, etc.
docker run --detach --name=expfactory-mysql --env="MYSQL_ROOT_PASSWORD=expfactory" \
                                            --env="MYSQL_DATABASE=db" \
                                            --env="MYSQL_USER=expfactory" \
                                            --env="MYSQL_PASSWORD=expfactory" \
                                             mysql
Note that if you ran the container -with --publish 6603:3306 it would be mapped to your host (localhost) making it accessible to the outside world. You should be able to see it with docker ps:
$ docker ps
CONTAINER ID        IMAGE                COMMAND                  CREATED             STATUS              PORTS                          NAMES
47f9d56f1b3f        mysql                "docker-entrypoint..."   2 minutes ago       Up 2 minutes        3306/tcp                       expfactory-mysql
and inspect it to get the IPAddress
$ docker inspect expfactory-mysql | grep '"IPAddress"'
            "IPAddress": "172.17.0.2",
This is good! We now have the address to give to our Expfactory container.
docker run -p 80:80 expfactory/experiments \
           --database "mysql+pymysql://expfactory:expfactory@172.17.0.2/db" \
           start
In the example above, the username is expfactory, the password is expfactory, the host is 172.17.0.2 that we inspected above, and the database name is db. You can now open the browser to do an experiment, and then (again) use python to inspect results. I like pymysql because it seems to work in Python 3:
import pymysql
conn = pymysql.connect(host='172.17.0.2',
                       user='expfactory',
                       password='expfactory',
                       db='db',
                       charset='utf8mb4',
                       cursorclass=pymysql.cursors.DictCursor)

try:
    with conn.cursor() as cursor:
        cursor.execute("SELECT * FROM result")
        result = cursor.fetchone()
        print(result)
finally:
    conn.close()
and the above will print a nice dump of the test task that we just took!
{'date': datetime.datetime(2017, 11, 19, 16, 28, 50), 'exp_id': 'test-task', 'data': '[{"rt":821,"stimulus":"<div class = \\"shapebox\\"><div id = \\"cross\\"></div></div>","key_press":32,"possible_responses":[32],"stim_duration":2000,"block_duration":2000,"timing_post_trial":100,"trial_id":"test","trial_type":"poldrack-single-stim","trial_index":0,"time_elapsed":2004,"internal_node_id":"0.0-0.0","addingOnTrial":"added!","exp_id":"test-task","full_screen":true,"focus_shifts":0},{"rt":400,"stimulus":"<div class = \\"shapebox\\"><div id = \\"cross\\"></div></div>","key_press":32,"possible_responses":[32],"stim_duration":2000,"block_duration":2000,"timing_post_trial":100,"trial_id":"test","trial_type":"poldrack-single-stim","trial_index":1,"time_elapsed":4108,"internal_node_id":"0.0-1.0","addingOnTrial":"added!","exp_id":"test-task","full_screen":false,"focus_shifts":0},{"rt":324,"stimulus":"<div class = \\"shapebox\\"><div id = \\"cross\\"></div></div>","key_press":32,"possible_responses":[32],"stim_duration":2000,"block_duration":2000,"timing_post_trial":100,"trial_id":"test","trial_type":"poldrack-single-stim","trial_index":2,"time_elapsed":6209,"internal_node_id":"0.0-2.0","addingOnTrial":"added!","exp_id":"test-task","full_screen":false,"focus_shifts":0,"added_Data?":"success!"},{"trial_type":"call-function","trial_index":3,"time_elapsed":6310,"internal_node_id":"0.0-3.0","exp_id":"test-task","full_screen":false,"focus_shifts":0},{"rt":4491,"responses":"{\\"Q0\\":\\"jhjkh\\",\\"Q1\\":\\"\\"}","trial_id":"post task questions","trial_type":"survey-text","trial_index":4,"time_elapsed":10805,"internal_node_id":"0.0-5.0","exp_id":"test-task","full_screen":false,"focus_shifts":0},{"text":"<div class = centerbox><p class = center-block-text>Thanks for completing this task!</p><p class = center-block-text>Press <strong>enter</strong> to continue.</p></div>","rt":1413,"key_press":13,"block_duration":1413,"timing_post_trial":0,"trial_id":"end","exp_id":"test-task","trial_type":"poldrack-text","trial_index":5,"time_elapsed":13219,"internal_node_id":"0.0-6.0","credit_var":true,"performance_var":600,"full_screen":false,"focus_shifts":0}]', 'id': 1, 'participant_id': 1}
Don’t forget to stop your image (control+c if it’s hanging, or docker stop <containerid> if detached, and then remove the mysql container after that.
docker stop expfactory-mysql
docker rm expfactory-mysql
Note that this is only an example, we recommend that you get proper hosting (for example, Stanford provides this for users) or use a standard cloud service (AWS or Google Cloud) to do the same. You generally want to make sure your database has sufficient levels of permissions to be sure, encryption if necessary, and redundancy (backup). Keep in mind that some experiments might give participants open boxes to type, meaning you should be careful about PHI, etc. This is also another reason that a much simpler, local save to the file system isn’t such a crazy idea. Always discuss your experiment strategy with your IRB before proceeding!
postgres
We can do similar to the above, but use postgres instead. First we will start a second container:
docker run --name expfactory-postgres --env POSTGRES_PASSWORD=expfactory \
                                      --env POSTGRES_USER=expfactory  \
                                      --env POSTGRES_DB=db \
                                      -d postgres
Ensure that our container is running with docker ps
docker ps
CONTAINER ID        IMAGE               COMMAND                  CREATED             STATUS              PORTS               NAMES
bb748a75bd91        postgres            "docker-entrypoint..."   2 seconds ago       Up 1 second         5432/tcp            expfactory-postgres
and of course get the IPAddress
$ docker inspect expfactory-postgres | grep '"IPAddress"'
            "IPAddress": "172.17.0.2",
Now we can again form our complete database url to give to the experiment factory container to connect to:
# postgres
docker run -p 80:80 vanessa/experiment \
           --database "postgres://expfactory:expfactory@172.17.0.2/db" \
           start
If you leave it hanging in the screen (note no -d for detached above) you will see this before the gunicorn log:
Database set as postgres://expfactory:expfactory@172.17.0.2/db
Now let’s again do the test task, and start up python on our local machine to see if we have results!
import psycopg2
db = "host='172.17.0.2' dbname='db' user='expfactory' password='expfactory'"
conn = psycopg2.connect(db)
cursor = conn.cursor()
cursor.execute("SELECT * FROM result")
result = cursor.fetchall()
And here is our row, a list with 5 indices.
[(1,
  datetime.datetime(2017, 11, 19, 16, 48, 51, 957224),
  '[{"rt":1294,"stimulus":"<div class = \\"shapebox\\"><div id = \\"cross\\"></div></div>","key_press":32,"possible_responses":[32],"stim_duration":2000,"block_duration":2000,"timing_post_trial":100,"trial_id":"test","trial_type":"poldrack-single-stim","trial_index":0,"time_elapsed":2005,"internal_node_id":"0.0-0.0","addingOnTrial":"added!","exp_id":"test-task","full_screen":false,"focus_shifts":0},{"rt":163,"stimulus":"<div class = \\"shapebox\\"><div id = \\"cross\\"></div></div>","key_press":32,"possible_responses":[32],"stim_duration":2000,"block_duration":2000,"timing_post_trial":100,"trial_id":"test","trial_type":"poldrack-single-stim","trial_index":1,"time_elapsed":4107,"internal_node_id":"0.0-1.0","addingOnTrial":"added!","exp_id":"test-task","full_screen":false,"focus_shifts":0},{"rt":324,"stimulus":"<div class = \\"shapebox\\"><div id = \\"cross\\"></div></div>","key_press":32,"possible_responses":[32],"stim_duration":2000,"block_duration":2000,"timing_post_trial":100,"trial_id":"test","trial_type":"poldrack-single-stim","trial_index":2,"time_elapsed":6208,"internal_node_id":"0.0-2.0","addingOnTrial":"added!","exp_id":"test-task","full_screen":false,"focus_shifts":0,"added_Data?":"success!"},{"trial_type":"call-function","trial_index":3,"time_elapsed":6309,"internal_node_id":"0.0-3.0","exp_id":"test-task","full_screen":false,"focus_shifts":0},{"rt":6904,"responses":"{\\"Q0\\":\\"bloop\\",\\"Q1\\":\\"debloop\\"}","trial_id":"post task questions","trial_type":"survey-text","trial_index":4,"time_elapsed":13217,"internal_node_id":"0.0-5.0","exp_id":"test-task","full_screen":false,"focus_shifts":0},{"text":"<div class = centerbox><p class = center-block-text>Thanks for completing this task!</p><p class = center-block-text>Press <strong>enter</strong> to continue.</p></div>","rt":916,"key_press":13,"block_duration":916,"timing_post_trial":0,"trial_id":"end","exp_id":"test-task","trial_type":"poldrack-text","trial_index":5,"time_elapsed":15135,"internal_node_id":"0.0-6.0","credit_var":true,"performance_var":676,"full_screen":false,"focus_shifts":0}]',
  'test-task',
  1)]
row[0][0]is the index for the result table, probably not usefulrow[0][1]is a python datetime object for when the result was createdrow[0][2]is the data from the experimentrow[0][3]is the experiment id (exp_id)row[0][4]is the participant id
Again, you should consider a robust and secure setup when running this in production. For the example, don’t forget to shut down your database after the image.
docker stop expfactory-postgres
docker rm expfactory-postgres
The reason to provide these arguments at runtime is that the particulars of the database (username, password, etc.) will not be saved with the image, but specified when you start it. Be careful that you do not save any secrets or credentials inside the image, and if you use an image with an existing expfactory config.py, you re-generate the secret first.
CouchDB/MariaDB/Mongo/Other
We haven’t yet developed this, and if you are interested, please file an issue. If you need help with more substantial or different deployments, please reach out!
Start your Participant
Here we assume that you have chosen some database and that your container is running, and will look quickly at the experience of running a participant through a selection of experiments. From the commands above, we see that we generated and started our container, and mapped it to port 80 on our machine.
Not mapping a folder to /scif/data assumes that either we don’t want to see files on the host, or if the image default is to save to a relational database external to the experiments container itself, we access data by querying this separate endpoint. For a filesystem or sqlite database, since the file is stored inside the container and we want access to it, we likely started with the location mapped:
docker run -p 80:80 -v /tmp/data:/scif/data vanessa/expfactory-experiments start
First, let’s discuss the portal - what you see when you go to 127.0.0.1.
The Experiment Factory Portal
When you start your container instance, browsing to your localhost will show the entrypoint, a user portal that lists all experiments installed in the container. If you have defined a limited subset with --experiments you will only see that set here:
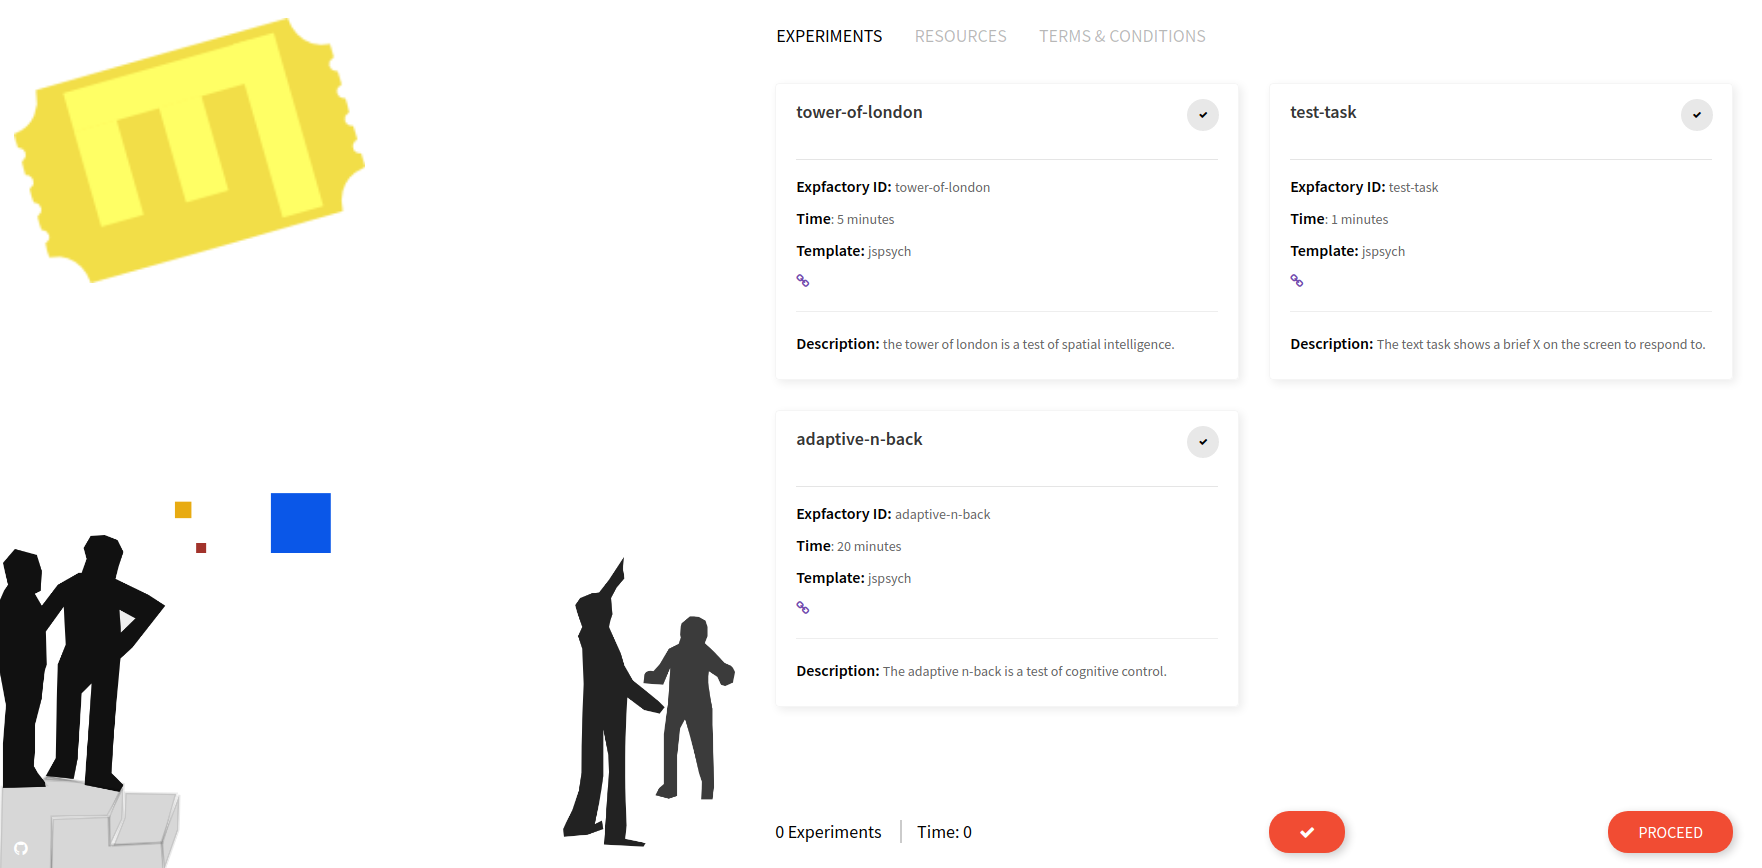
This is where the experiment administrator would select one or more experiments, either with the single large checkbox (“select all”) or smaller individual checkboxes. When you make a selection, the estimated time and experiment count on the bottom of the page are adjusted, and you can inspect individual experiment times:
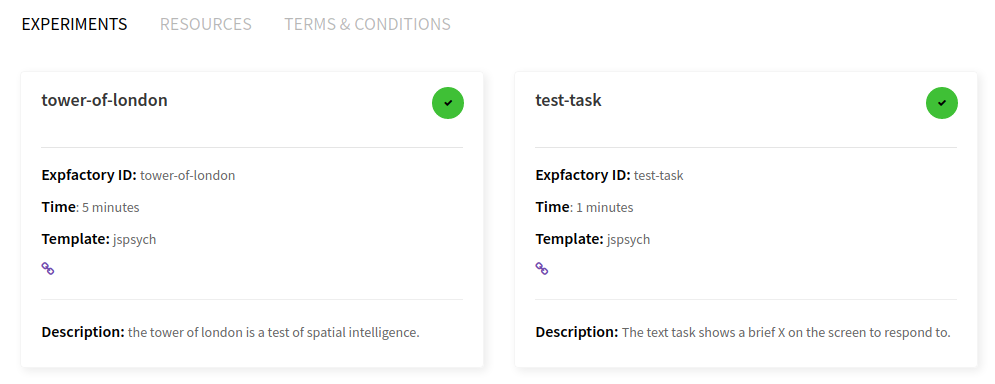
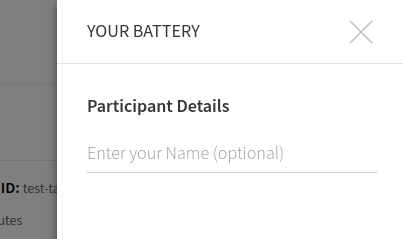
You can make a selection and then start your session. I would recommend the test-task as a first try, because it finishes quickly. When you click on proceed a panel will pop up that gives you choices for ordering and an (optional) Participant name.
If you care about order, the order that you selected the boxes will be maintained for the session:
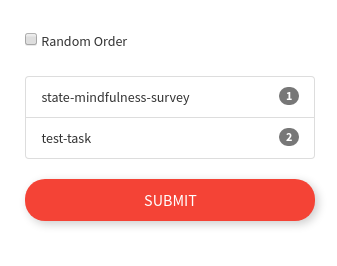
or if you want random selection, just check the box. This is the default setting.

This name is currently is only used to say hello to the participant. The actual experiment identifier is based on a study id defined in the build recipe. After proceeding, there is a default “consent” screen that you must agree to (or disagree to return to the portal):
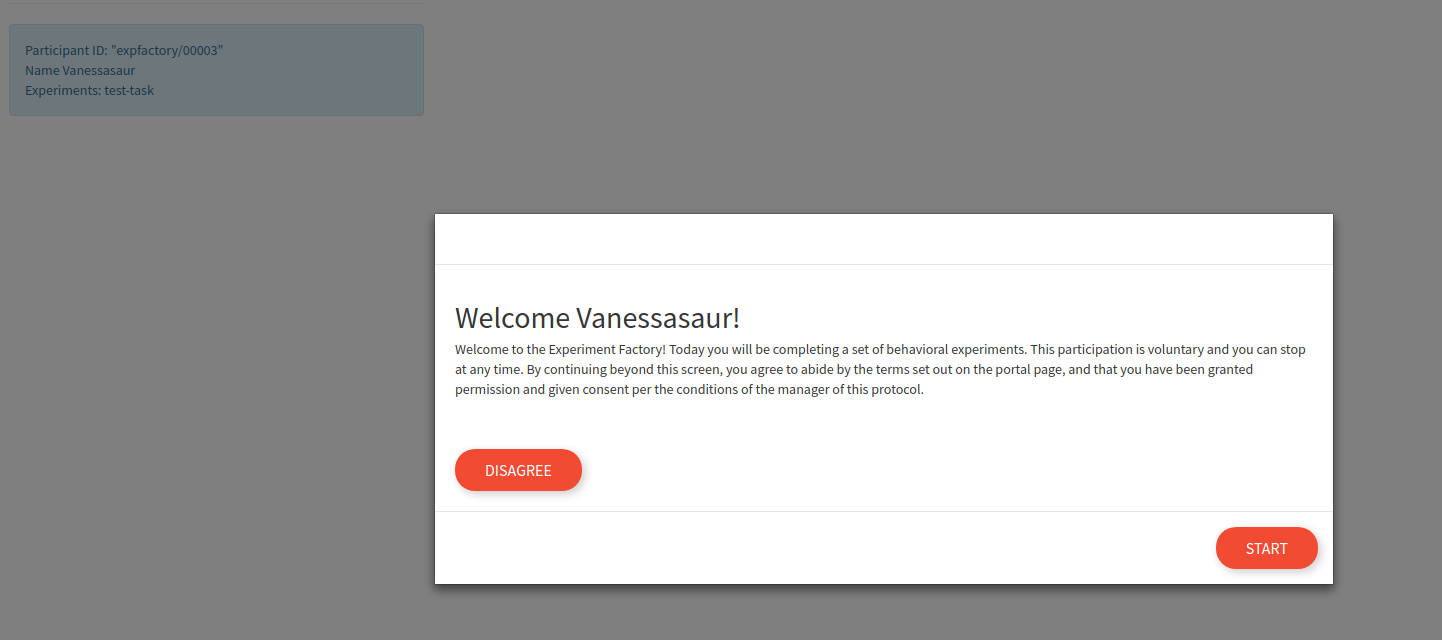
Once the session is started, the user is guided through each experiment (with random selection) until no more are remaining.

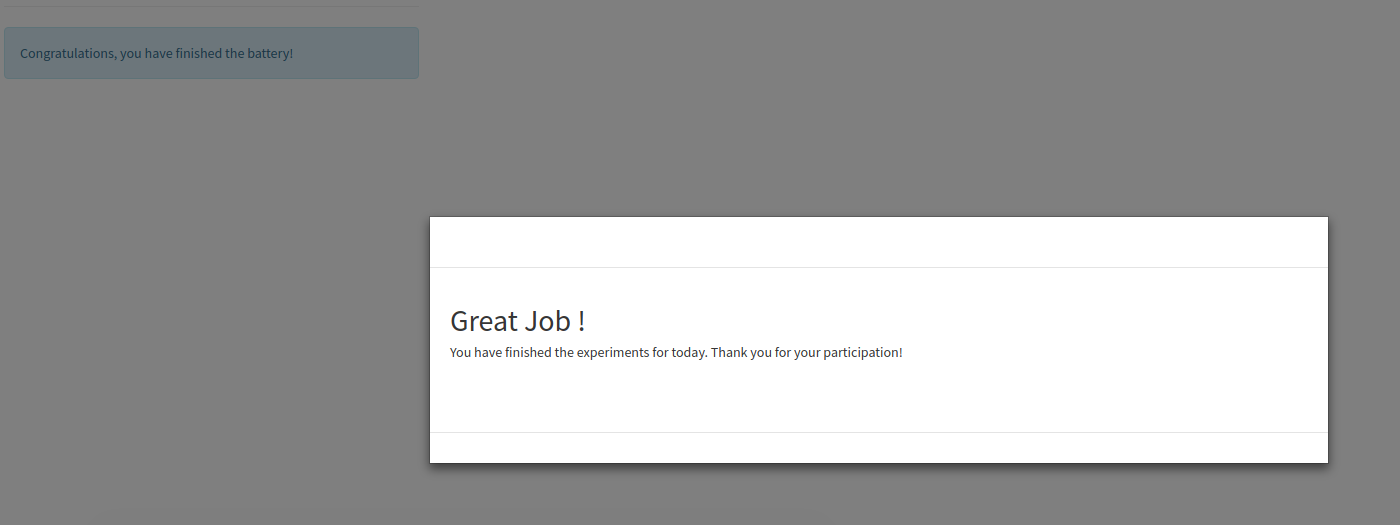
When you finish, you will see a “congratulations” screen
Generally, when you administer a battery of experiments you want to ensure that:
- if a database isn’t external to the container, the folder is mapped (or the container kept running to retrieve results from) otherwise you will lose the results.
- if the container is being served on a server open to the world, you have added proper authorization (note this isn’t developed yet, please file an issue if you need this)
- you have fully tested data collection and inspected the results before administering any kind of “production” battery.
Working with JSON
Whether you find your json objects in a file (filesystem) or saved in a text field in a relational database (sqlite) you will reach some point where you have a bunch of json objects to parse to work with your data. Json means “JavaScript Object Notation,” and natively is found in browsers (with JavaScript, of course). It’s flexibility in structure (it’s not a relational database) makes it well suited to saving experiments with many different organizations of results. This also makes it more challenging for you, the researcher, given that you have to parse many experiments with different formats. Generally, experiments that use the same paradigm (e.g., jspsych or phaser) will have similar structures, and we can show you easily how to read JSON into different programming languages.
We have provided example scripts in a gist for Python and R (at the bottom) that you can easily run to “extract” the inner json data structure, and then it can be loaded into your software of choice. Generally, the usage is as follows:
wget https://gist.githubusercontent.com/vsoch/76d8933e3ff7e080883362b8baa4a164/raw/9236b3877ad848d848a1391a940b105645ee71ba/parse.py
python parse.py stroop-results.json

# or for more than one file at once
python parse.py stroop-results.json go-no-go-results.json
The above command will produce equivalently named files in the present working directory prefixed with “parsed_”.
And here is the same shown in python, if you want to implement your own parser:
# python

import json

with open('test-task-results.json','r') as filey:
    content = json.load(filey)

# What are the keys of the dictionary?
content.keys()
dict_keys(['data'])
You are probably expecting another dictionary object under data. However, we can’t be sure that every experiment will want to save data in JSON. For this reason, the key under data is actually a string:
type(content['data'])
str
And since we know jspsych saves json, it’s fairly easy to load the string to get the final dictionary:
result = json.loads(content['data'])
Now our result is a list, each a json object for one timepoint in the experiment:
result[0]
{'focus_shifts': 0,
 'internal_node_id': '0.0-0.0-0.0',
 'full_screen': True,
 'key_press': 13,
 'exp_id': 'tower-of-london',
 'time_elapsed': 1047,
 'trial_index': 0,
 'trial_type': 'poldrack-text',
 'trial_id': 'instruction',
 'timing_post_trial': 0,
 'rt': 1042,
 'text': '<div class = centerbox><p class = center-block-text>Welcome to the experiment. This experiment will take about 5 minutes. Press <strong>enter</strong> to begin.</p></div>',
 'block_duration': 1042}
My preference is to parse the result like this, but if you prefer data frames, one trick I like to do is to use pandas to easily turn a list of (one level) dictionary into a dataframe, and then you can save to tab delimited file (.tsv).
import pandas

df = pandas.DataFrame.from_dict(result)
df.to_csv('tower-of-london-result.tsv', sep="\t")
You should generally use a delimiter like tab, as it’s commonly the case that fields have commas and quotes (so a subsequent read will not maintain the original structure).
Feedback Wanted!
A few questions for you!
- Would password protection of the portal be desired?
To best develop the software for different deployment, it’s important to discuss these issues. Please post an issue to give feedback.